Canine Hygiene: Beyond Bathing and Brushing
Benefits of taking care of a dog's hygiene to keep them happy and healthy.
Canine Hygiene: Beyond Bathing and Brushing
Getting a new puppy is an exciting time for both the new pet parent and the puppy. They will be getting to know one another’s preferences, setting boundaries, and learning what to expect on a daily basis. It’s helpful to set your pup’s expectations around handling and grooming as early as possible, getting them used to having their mouth examined and sensitive areas like their feet and ears handled.
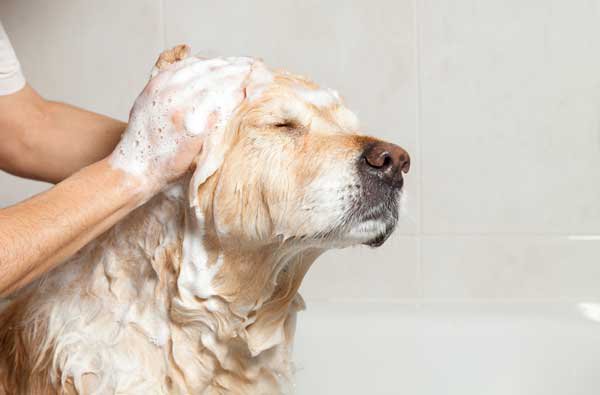
Good grooming and hygiene habits will not only help your canine companion look their best, but they will also help your furbaby live a longer, healthier life. Although keeping your dog bathed and brushed regularly is important, it is not the only crucial component of their health and hygiene. Simple tasks such as brushing your dog’s teeth, cleaning their ears and eyes, and ensuring that their nails are properly trimmed can vastly improve their health and quality of life.
Fortunately, these hygiene basics don’t take up much time and are relatively simple to accomplish.
Brushing your Dog’s Teeth
Dental hygiene is extremely important to canine health. Poor dental health can result in broken teeth, inflamed gums, and dangerous infections. For most dogs, brushing their teeth two to three times a week is sufficient to prevent tartar buildup. Some breeds, especially brachycephalic breeds and those with small or narrow mouths, may require daily brushing to help prevent tooth loss as they get older.
Dental treats and chews are helpful for removing plaque between brushings, but should not be used as a substitute for regular brushing. Remember to follow the instructions on the packaging. Some dental treats can cause diarrhea and other gastrointestinal issues if given in excess.
Brushing your dog’s teeth doesn’t have to be an onerous task, however, especially if you get your dog used to the process at a young age. Follow these steps to get your canine companion comfortable with having their teeth brushed.
Tools:
-
Toothbrush—Dog’s mouths are constructed very differently from human mouths, so should have a toothbrush designed with the canine mouth in mind. These tend to be designed with longer handles and angles that better reach their teeth. The bristles are typically softer than those of human toothbrushes as well. Toothbrushes should be replaced approximately every three months.
Alternatives to traditional canine toothbrushes can include specialized canine toothbrushes that fit over the owner’s finger or toothbrushes developed for infants.
-
Toothpaste—The fluoride in toothpaste created for humans is toxic to our dogs, as are some of the sweeteners used. Canine toothpaste has no fluoride, comes in dog-friendly flavors, and typically doesn’t foam, a sensation most dogs find distasteful.
Step 1: Introduce Your Pup to the Idea
Acclimating your animal to the process slowly will help them to be more comfortable with it. Start by gently lifting their lips and massaging their gums to get them used to the sensation. Start with just a few seconds per session, gradually increasing the time to thirty seconds. Contact your veterinarian if you discover bleeding gums or chipped or cracked teeth.
Let the pup lick the tasty canine toothpaste off their toothbrush after each session and praise them enthusiastically. If you have multiple dogs, each should have its own toothbrush, to prevent the spread of bacteria.
Step 2: Brushing the Teeth
Once they appear excited when you produce the toothbrush, it’s time to try actually brushing their teeth. Use gentle circular motions, focusing on the canines, the surfaces that lie close to the lips, and the back molars. Brushing the inside surfaces of the teeth is more objectionable to most dogs and less critical. Never force the issue if they balk at brushing as this can lead to an overall fear of the toothbrush.
Cleaning Your Dog’s Eyes and Ears
Ensuring that your pet’s eyes and ears are clean and healthy is an important part of their care. For many breeds, this is an occasional task, performed about once a month or less. Some breeds, due to their physiology, may require more frequent attention.
Keeping your dog’s eyes and ears clean only takes a few minutes, helps to avoid infections, and can reduce allergy symptoms.
Eyes:
Most breeds only need their eyes cleaned after a bath or when there is noticeable build-up. Some breeds, such as those with white fur, brachycephalic breeds, and breeds with drooping eyes, may need more frequent cleaning.
Tools:
-
Applicator—Pet parents can choose to use a cotton ball, washcloth, or sterile gauze to apply warm water or eyewash to the area around the eyes. Use a new applicator for each eye.
-
Water or Eye Wash—In most cases, warm water is effective enough to remove most eye gunk. Dogs that are prone to eye trouble or those with white fur around the eyes may need to use pet eyewashes or tear stain removers.
Moisten your chosen applicator with either water or other cleaning product. Gently wipe any gunk or crusting away from the eye, being careful not to get too much in the eye itself.
Ears:
Your dog’s ear flaps should be inspected at least once a month for dirt, discharge, scratches, or parasites, and checked for moisture after every swim. Some breeds, especially those with floppy ears, are prone to developing ear infections and should be checked more frequently.
Tools:
-
Applicator—A cotton ball, gauze, or a washcloth can be used to wipe away wax and other debris from the ear flap.
-
Warm Water or Ear Cleaning Solution—In many cases, warm water may be enough to remove debris from the ear flaps, but vet-approved ear cleaning solutions may be needed to remove deeply embedded wax.
To clean the ear flap moisten your chosen applicator with warm water or cleaning solution and gently wipe away from the ear. If you suspect wax buildup, contact your veterinarian for instructions for choosing the best product for your specific pet and for how to use it.
Caring for Your Dog’s Nails
Caring for your dog’s feet is a crucial part of pet care. Untrimmed nails can break, splinter, and reduce traction and can lead to slips, falls, and even permanent damage to the tendons and bones of the feet. Unfortunately, most dogs don’t like their feet touched, so this process takes a little patience but can become a fun part of your routine once your dog becomes acclimated to it
Tools
-
Trimmer or Grinders—Pet parents can use either nail clippers/trimmers or Dremel-like grinders made to prune their dog’s nails. It is best to use clippers or grinders specifically designed for pets. Clippers designed for human nails aren’t typically strong enough to cleanly cut through canine nails and can crush or split the nail, sometimes causing it to bleed.
-
Styptic Powder or Cornstarch—Canine toenails, unlike human nails, have a blood vessel running through them. This means that cutting a toenail too closely can lead to a bleeding foot. If this happens, you will want to have styptic powder on hand to quickly staunch the flow of blood. If you are unable to find styptic powder or a styptic pen nearby, cornstarch, though not quite as effective, can still do the trick.
-
Distraction (optional)—Most dogs are not comfortable with this process, but unless your dog wears their nails down naturally, it is necessary. To help keep it from being distressing, some pet parents find it helpful to set up a distraction to keep their dog occupied, such as a lick mat with peanut butter.
Step 1: Paw Handling
The first step in caring for your dog’s nails is to get them used to having their feet handled. The easiest way to get them accustomed to having their feet handled is to keep sessions short to start with, sometimes as short as a few seconds, increasing the duration as their comfort level increases. Once your dog is comfortable with you handling their paws for a few minutes at a time, you can move on to the next step.
Step 2: Introducing the Instruments
The sounds of the instruments required to trim nails can produce anxiety in some dogs. Clip the clippers or run the grinder near the dog’s paws to get them used to the sound before they have to get used to a new sensation. This may be a good time to produce a distraction for dogs that have difficulty overcoming their anxiety. Once your dog has learned to tolerate the sound without flinching, you are ready to trim their nails.
Step 3: Trimming the Nails
While holding your dog’s paw, very gently push your thumb slightly up and backward on the pad of the foot to extend the claw. If you are using clippers, clip only the tip of the nail and avoid clipping past the curve in the claw. Those using a grinder should support the toes firmly when grinding and grind only a small portion of the claw at a time to prevent grinding past the quick. If your dog has long fur, avoid pulling their fur by keeping it clear of the rotating grinder. Reward your dog for their good behavior with treats or playtime, so that they associate the experience with fun and look forward to it in the future.
Caring for your dog’s teeth, nails, ears, and eyes takes just a short amount of your time and has a huge impact. Not only does it help to keep your dog looking and smelling fresh, but it also helps to ensure that your precious pooch lives a longer, healthier life.
Stop by Cedar Pet Supplies for your grooming needs!